Get Started with Embedding Oracle Analytics
This blog will describe the easiest way to get started with embedding Oracle Analytics using VS Code and the built-in toolkit ‘Emmet’ and extension ‘LiveServer’. This is a link to the documentation for Analytics embedding.
Pre-requisites to embedding
Before you can embed any Oracle Analytics canvases, there are two key pre-requsites.
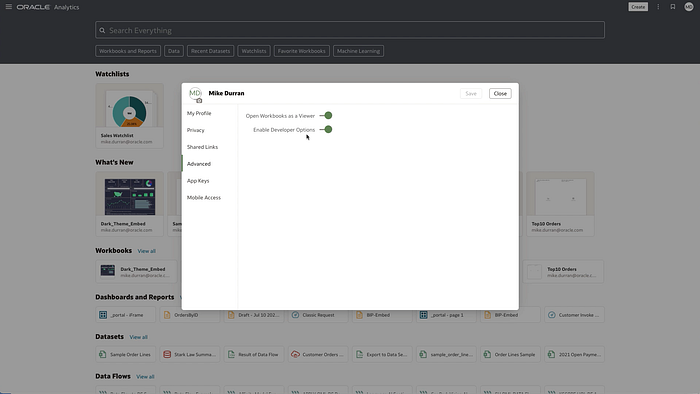
(1) Ensure that you have ‘Enable Developer Options’ turned on within your profile. This will allow you to see the ‘Developer’ menu option within a workbook and view the code required for embedding.
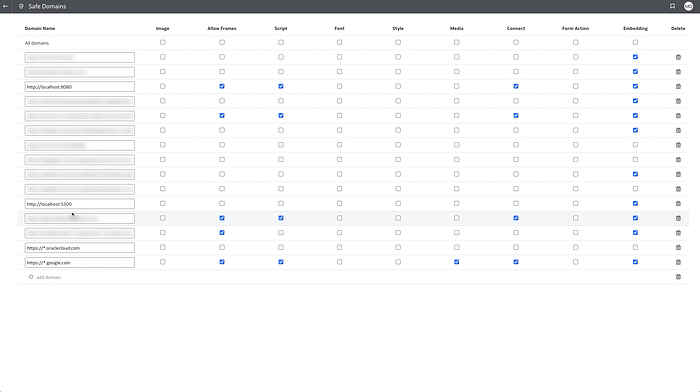
(2) Add an entry to the Oracle Analytics safe domains configuration for the server where you are hosting the embedding HTML file. For development purposes, this is typically a localhost and using VS Code and Live Server, this will be http://localhost:5500 by default.
Create a HTML file
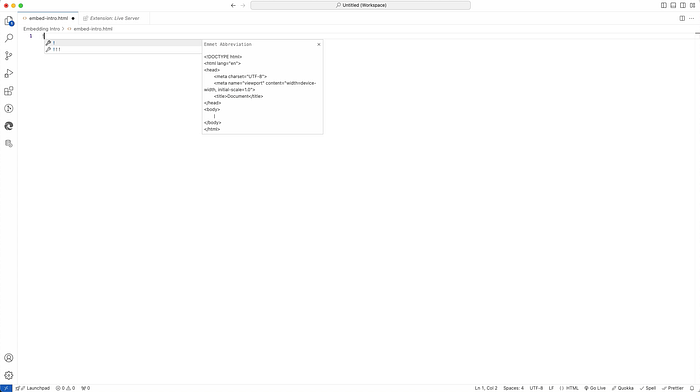
Within VS Code, create a file of type HTML, then type ! then TAB and Emmet will create a basic HTML template for you.
Copy embed code from Oracle Analytics
Oracle Analytics provides the code required to embed a particular canvas within the ‘Developer’ menu option. If you open this, you’ll see an ‘Embed’ section that includes the main code required to embed. This code can be copied into the HTML template created in VS Code.
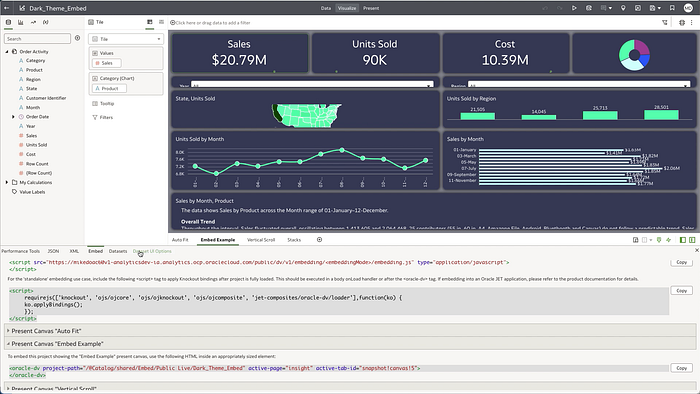
There are three main components to the embedding code:
(1) A <script> tag including a link to embedding.js. This is specific to the Analytics instance and has two paths — either ‘standalone’ or ‘jet’. In this example, ‘standalone’ is used but if you are embedding into an application built (or that uses) Oracle JET then use the ‘jet’ option in the URL path.
(2) The <oracle-dv> tag that includes a path to the project, a reference to use the ‘insight’ and the active-tab-id which refers to the specific canvas to embed.
(3) Another <script> tag that includes dependencies defined by requirejs and a knockout applybindings command. These are components used by the Oracle JavaScript Extension Toolkit (JET) MVVM architecture.
The HTML file should look like this after adding these three components:
<!DOCTYPE html>
<html lang="en">
<head>
    <meta charset="UTF-8">
    <meta name="viewport" content="width=device-width, initial-scale=1.0">
    <title>Document</title>
    <script src="https://<your-oac-instance>.analytics.ocp.oraclecloud.com/public/dv/v1/embedding/standalone/embedding.js" type="application/javascript">
    </script>
</head>
<body>

<div style="position: absolute; width: 100%; height: 100%">

    <oracle-dv project-path="/@Catalog/shared/Embed/Public Live/Dark_Theme_Embed" active-page="insight" active-tab-id="snapshot!canvas!5">
    </oracle-dv>

</div>


</body>

<script>
    requirejs(['knockout', 'ojs/ojcore', 'ojs/ojknockout', 'ojs/ojcomposite', 'jet-composites/oracle-dv/loader'],function(ko) {
     ko.applyBindings();
     });
</script>

</html>
Go Live in VS Code
Once these code components have been added to the HTML file, then invoke the ‘Go Live’ option in VS Code to have a browser window open and view the embedded analytics canvas.
